Have you ever walked into a room and felt instantly at ease because everything seemed right? Often, it’s not the fancy furniture or the expensive paintings on the walls that create this feeling. It’s something much simpler: smooth, flawless walls.
Smooth walls are like your home’s canvas; just like a canvas, any imperfection can catch the eye. That’s why knowing how to fill in drywall gaps is a skill worth having.
But why do these annoying gaps show up in the first place? There are a few usual suspects:
- The house settling
- Changes in temperature and humidity
- Maybe a little bump or accident
Whatever the cause, these gaps can be an eyesore and can even lead to bigger problems if not fixed.
In this article, we’ll dive into the world of drywall – the stuff your walls are likely made of – and learn how to fix those gaps like a pro. We’ll cover everything from why gaps happen to how to make them disappear.
So, grab your putty knife because we’re about to get those walls looking perfect!
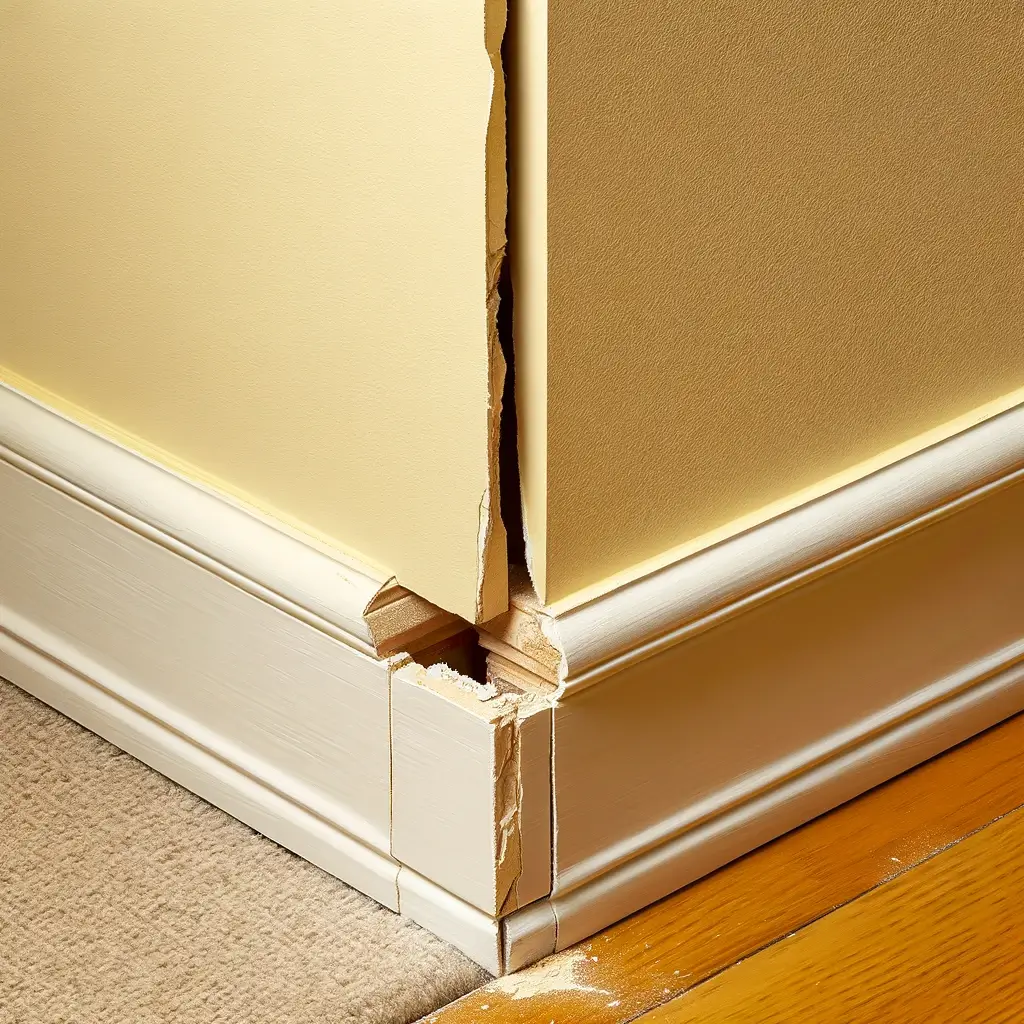
Understanding Drywall Gaps
The Anatomy of Drywall
Before we can fix the gaps, we need to understand what we’re working with. Drywall, also known as sheetrock, is a panel made of gypsum plaster pressed between two thick sheets of paper. It’s used to create walls and ceilings in most homes. It’s popular because it’s easy to install, durable, and has a fire-resistant quality.
But even the best materials have their weaknesses. Over time, drywall can move, shift, or settle, leading to gaps. Sometimes, it’s just a natural part of a house “settling in.” Other times, it might be due to moisture or a not-so-perfect installation job.
Types of Drywall Gaps
Now, let’s talk about the gaps you might find in your drywall. There are a few common ones:
- Shrinkage gaps: These happen when the wood framing of your house dries out and shrinks, leaving a little space between the drywall panels.
- Settlement gaps: These occur as your house settles over time, which is normal. As it does, small gaps can appear.
- Cut-out errors: Sometimes, when holes are cut in the drywall for outlets or switches, they’re a bit too big, leaving a gap.
- Gaps due to damage: Life happens, and so do accidents. A door might open too fast and bang into the wall, or moving furniture might take a chunk out of your drywall.
No matter the type of gap, the good news is that they can all be fixed. And that’s exactly what we’re going to learn next.
The Consequences of Ignoring Drywall Gaps
Ignoring drywall gaps is like ignoring a small leak in a boat; it might not seem like a big deal at first, but it can lead to bigger problems down the line. Here’s what could happen if those gaps are left unfilled:
- Compromised Wall Integrity: Consider the gaps as weak spots in your wall’s armor. Over time, these weak spots can grow, leading to cracks or even sections of the wall that could crumble. It’s like when a small crack in a car’s windshield grows over time. You don’t want that happening to your walls.
- Aesthetic Issues: It’s not just about strength, though. Gaps can be plain ugly. They interrupt the smooth surface of your walls, making them look neglected. If you’re proud of your home and love a clean, finished look, filling in those gaps should be on your to-do list.
- Potential for Moisture and Pest Intrusion: Small gaps might as well be welcome signs for moisture and tiny critters. Moisture can seep in, leading to mold or mildew, which are unsightly and can cause health issues. And pests? Nobody wants to share their home with bugs that can sneak in through gaps.
So, while it might be tempting to put off fixing those gaps, doing so can lead to more future headaches (and costs). It’s best to tackle the problem head-on and fill those gaps as soon as you spot them.
Preparing to Fill Drywall Gaps
Before you start the process of filling those gaps, it’s important to get everything ready. This means not only gathering your tools and materials but also making sure you’re working safely.
Safety First: Protective Gear and Precautions
Safety should always be your top priority when doing any kind of home improvement work. Here’s what you’ll need to protect yourself:
- Safety goggles: Drywall work can create dust and debris that can irritate or damage your eyes. Always wear goggles to protect your vision.
- Dust masks: Breathing in drywall dust isn’t good for your lungs. A dust mask or a respirator will help keep those particles out of your airways.
- Gloves: Drywall compound can dry out your skin, and sanding can be rough on your hands. Gloves will help protect your skin from irritation.
- Long sleeves and pants: Wearing long sleeves and pants can prevent irritation caused by drywall dust on your skin.
- Ear protection: If you’re using loud tools, ear protection is a must to safeguard your hearing.
Tools and Materials You Will Need
Now, let’s talk about the tools and materials you’ll need to fill in those gaps:
- Joint compound: This is the stuff you’ll use to fill in the gaps. It’s also known as “mud.”
- Drywall tape: This tape helps reinforce the joint compound and prevents cracks from forming as it dries.
- Putty knives: You’ll need these to apply and smooth out the joint compound.
- Sandpaper: Once the joint compound is dry, you’ll use sandpaper to smooth everything out.
- A sanding block or pole sander: This tool will help you sand large areas evenly.
- A utility knife: You might need this to trim any excess drywall tape or to clean up the edges of the gaps.
- A measuring tape and pencil: These are essential for marking and measuring before you cut any tape or backing material.
- A straight edge or T-square: This will help you make precise cuts or lines on the drywall or tape.
- A drywall saw or keyhole saw: If you need to enlarge a gap slightly to make a cleaner repair, this saw will do the job.
- A mud pan: This is handy for holding and carrying joint compound as you work.
Preparing the Work Area
Before you start filling in those gaps, you need to prepare your work area:
- Clearing the space: Move any furniture or items away from the wall. You’ll need room to work and don’t want to get a joint compound on your belongings.
- Protecting furniture and floors: Lay down drop cloths or plastic sheeting to protect your floors and any furniture that can’t be moved.
- Ensuring adequate ventilation: A joint compound can smell strongly, and you’ll create dust when you sand. Open windows, use fans or even consider an air purifier to keep the air in your work area clean.
With your safety gear on, tools and materials ready, and the work area prepared, you’re all set to start the process of filling those drywall gaps and getting those walls back to looking their best.
Step-by-Step Guide to Filling Drywall Gaps
Now that you’re all geared up, and your workspace is prepped, it’s time to get down to the business of filling those gaps. Whether you’re dealing with a tiny crack or a big gap, there’s a right way to make them disappear.
Assessing the Gap
First things first, you need to take a good look at the gap you’re dealing with:
- Determining the width and depth: Use a ruler or measuring tape to understand the size of the gap. This will help you decide how much material you’ll need to fill it.
- Deciding on the best approach: Small gaps usually need a simple fix, while larger gaps might require more work, including additional support inside the gap.
Filling Small Gaps: The Quick Fix
For those little cracks and tiny gaps, here’s how to get a quick fix:
- Applying joint compound: Scoop some joint compound onto your putty knife and press it into the gap. Make sure it’s packed in there and level with the wall’s surface.
- Smoothing and feathering techniques: Use your putty knife to smooth out the compound and feather the edges. This means you’ll make the edges of the compound thinner than the center, blending it into the wall.
Tackling Larger Gaps: A Detailed Approach
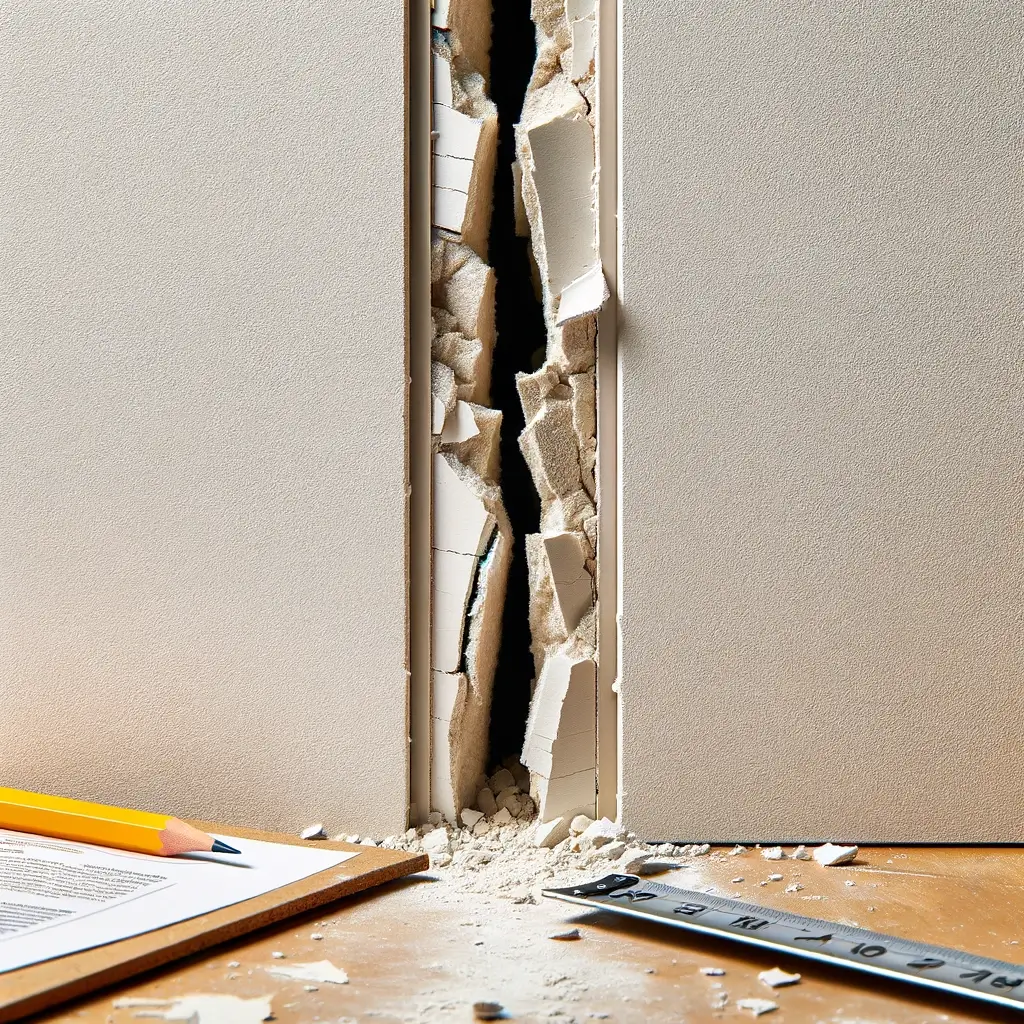
Bigger gaps need a bit more love and attention:
- Using backing material: For gaps wider than half an inch, you’ll want to use a strip of backing material, like a piece of drywall or wood, to support the joint compound.
- Applying and embedding drywall tape: Once you’ve filled the gap with a layer of joint compound, apply drywall tape over it, then apply another compound layer over the tape.
- Layering joint compound: It’s all about layers. Apply the compound, let it dry, then add another layer. This builds up the strength and ensures the gap is filled evenly.
Drying and Reapplication
Patience is key here:
- Waiting times for drying: Each layer of joint compound needs to dry completely before you add the next one. This could take anywhere from a few hours to overnight, depending on the product and the thickness of the application.
- Adding subsequent layers: After each layer dries, assess if you need another one. Sometimes, one layer is enough; other times, you might need two or three to get a smooth, level finish.
Sanding for Smoothness
The final step is all about getting that perfect, smooth finish:
- Techniques for dust-free sanding: To minimize dust, use a damp sponge to smooth the dried joint compound before it’s fully set. If sanding after it’s set, use a sanding block or a pole sander with fine-grit sandpaper.
- Achieving a seamless finish: You aim to make the filled gap indistinguishable from the rest of the wall. Sand in wide, gentle strokes, and keep checking with your hand for smoothness.
Remember, patience and attention to detail are the key to a professional-looking finish.
Advanced Techniques for Perfect Results
Once you’ve mastered filling drywall gaps, you might be ready to tackle more advanced techniques. These can help you achieve even better results, especially in those tricky spots or when you’re looking for a finish that’s got to stand up to scrutiny.
Using Setting-Type Joint Compound
Setting-type joint compound is a step up from the pre-mixed variety and offers some distinct advantages:
- Benefits over ready-mixed compounds: Setting-type compounds dry through a chemical reaction, not just by evaporation. This means it’s less likely to shrink and crack and sets much faster, allowing you to work quicker.
- Mixing and application tips: Mix this compound with water until it reaches the right consistency. It’s important not to mix more than you can use in a short period, as it can set quickly. Apply it just as you would pre-mixed compound, but keep the quicker setting time in mind.
Dealing with Gaps at Corners and Edges
Corners and edges are notorious for showing imperfections, so they need a little extra care:
- Special considerations for tricky areas: Corners need to be straight and sharp, which can be challenging if there’s a gap. Use a corner-taping tool or a corner bead to help shape the joint compound.
- Tips for crisp, clean corners: Apply tape specifically designed for corners. Use a corner tool to press it firmly into the compound. Feather the edges to blend with the wall, and apply enough compound to fill any voids without leaving excess.
Addressing Gaps Between Drywall and Different Materials
Sometimes, your drywall will be stacked against different materials, like wood trim, metal frames, or masonry. These junctions can be a little complex:
- Transitioning to wood, metal, or masonry: Each material behaves differently from drywall, especially in expansion and contraction. You’ll need to consider this when filling gaps between them.
- Sealants and caulks for gap bridging: A flexible sealant or caulk is often a better choice than a rigid joint compound. These materials can flex with the movements of different materials and provide a durable, long-lasting seal.
Using these advanced techniques, you can ensure that every wall part looks great, not just the easy-to-reach flat areas.
Finishing Touches
You’re ready for the final steps once you’ve filled those gaps and sanded everything down to a smooth finish. These finishing touches will make all the difference, giving your walls a professional, polished look.
Priming and Painting Over Repaired Areas
Before you break out the paintbrushes and rollers, there’s one critical step you can’t skip: priming. Selecting the right primer is essential because it helps the paint stick better and last longer. It also ensures that your repairs don’t stand out from the rest of the wall. Look for a primer compatible with your paint type and suitable for drywall.
When it’s time to paint, you’ll want to use painting techniques for uniformity. This means using the same type of brush or roller that was used on the rest of the wall. Use a roller if the rest of the wall has a roller texture. For brush textures, use a brush. Start with a light coat, let it dry, and add one or two more coats as needed. The key is to blend your new paint with the old so everything looks seamless.
Texturing to Match Existing Walls
If your walls have texture, you’ll want to replicate that in your repairs. Here’s how to do it:
- Different texturing methods: There are several ways to texture a wall. Some people use special brushes, while others might use a sponge or a crumpled-up paper. The method you choose will depend on the type of texture you’re trying to match.
- Tools for texturing: You might need a texturing brush, a sponge, or a trowel, depending on the look you’re going for. Texturing compounds and additives can also be mixed with paint or joint compounds to create different effects.
Cleaning Up
The last step in any good repair job is the cleanup. Proper disposal of materials is important. Leftover joint compounds and any waste material should be discarded according to local regulations. Don’t pour leftover compounds down the drain; it can clog your pipes.
When cleaning tools for future use, cleaning them while the compound is still wet is best. Use warm water and a brush to remove all the material from your putty knives, trays, and other tools. Dry them thoroughly to prevent rusting.
By doing these finishing touches, you’ll ensure that your wall repairs are invisible and that your walls look as good as new.
Maintenance and Prevention
Keeping your walls in top shape is not just about fixing problems as they arise; it’s also about regular maintenance and taking steps to prevent issues before they start. Here’s how you can stay ahead of the game.
Regular Wall Inspections
To keep your walls looking their best, you should know what to look for and when to perform inspections. Here are some pointers:
- Look for cracks, holes, or gaps in the drywall.
- Check for any signs of moisture, such as staining or peeling paint.
- Be looking for mold or mildew, which can indicate a moisture problem.
- Inspect for any bulging or warping, which could signal structural issues.
- Examine areas around windows and doors, as these are common places for gaps to appear.
As for timing, it’s wise to perform a thorough wall inspection:
- The change of each season, as temperature and humidity shifts, can cause expansion and contraction in your home’s materials.
- After any significant weather events, like a storm or heavy rains, which could cause damage.
- Before and after any major home renovations, ensure that the work hasn’t affected the integrity of your walls.
Preventative Measures
As the saying goes, an ounce of prevention is worth a pound of cure. Here are five preventative measures to help keep your walls gap-free:
- Control humidity and temperature: Use dehumidifiers and maintain a consistent indoor temperature to minimize the expansion and contraction of wall materials.
- Proper wall support and framing: Ensure your home’s framing is done correctly, as improper framing can lead to drywall cracks and gaps.
- Seal windows and doors: This can prevent moisture from getting into your walls and causing damage.
- Use high-quality materials: When building or making repairs, choose less prone to shrinkage and warping.
- Regularly check plumbing and fixtures: Leaks can lead to moisture problems, which in turn can cause wall gaps.
When to Call a Professional
Sometimes, a job is too big or too complex for the average DIY enthusiast. That’s when it’s time to call in the pros.
As the saying goes, “The expert at anything was once a beginner,”
but when it comes to your home, you want someone who’s already climbed that mountain of expertise.
- Recognizing jobs beyond DIY: If you’re facing large gaps, signs of structural damage, or extensive moisture issues, it’s time to call a professional.
- How to choose a reputable contractor: Look for someone with good reviews, proper licensing, and a portfolio of completed work. Don’t be afraid to ask for references and proof of insurance.
“Choosing the right professional is like choosing a partner for a dance. You want someone who knows the steps, can keep up with the rhythm, and won’t step on your toes,”
says John Doever, a seasoned contractor with over 20 years of experience.
Remember, your home is an investment, and taking care of it ensures that investment grows over time.
Frequently Asked Questions
Can you paint over the drywall without taping and mudding the seams?
It is not recommended to paint over drywall without taping and mudding the seams because they may be visible through the paint, leading to an unprofessional finish. Taping and mudding help create a smooth, seamless surface that results in a much more polished look after painting.
How do you fix a large hole in drywall?
To fix a large hole in drywall, you need to cut a piece of drywall to fit the hole, secure it with drywall screws to the surrounding studs, tape the seams, and then apply joint compound. Sand the area smooth after the compound dries, and it’s ready for priming and painting.
Is it necessary to prime drywall before painting?
Yes, it is necessary to prime drywall before painting. Primer seals the drywall and provides a smooth surface for the paint to adhere to, ensuring an even finish and improved durability of the paint job.
How do you avoid bubbles when taping drywall?
To avoid bubbles when taping drywall:
- Ensure the joint compound is spread evenly and the tape is firmly pressed into the compound.
- Remove any excess compound from under the tape using a drywall knife and apply a thin layer of compound over the tape.
- Let it dry completely before adding more layers.
Can you use caulk to fill drywall gaps?
Caulk can be used for very small gaps, especially where drywall meets trim or in corners where flexibility is needed. However, for proper drywall repairs, especially for gaps between panels, it’s best to use joint compound and drywall tape for a more durable and seamless repair.
Conclusion
Congratulations! You’ve just taken an in-depth exploration into the world of drywall repair, learning how to fill in those gaps and keep your walls looking their best over the long haul. Whether you’re a seasoned DIY enthusiast or a beginner looking to tackle your first project, remember that every pro was once a beginner. With patience, practice, and some elbow grease, you can achieve smooth, strong, and stunning walls.
Here are some final tips to keep in mind:
- Stay vigilant: Regular inspections can catch small problems before they become big.
- Keep learning: The world of DIY home repair is vast and full of resources. Keep reading, watching, and learning.
- Invest in good tools: Quality tools make a difference. They can turn a frustrating job into a pleasure and give you better results.
- Don’t be afraid to try: Every attempt is a learning experience that makes you more skilled for the next project.
And finally, If you’ve found this guide helpful, or if you’ve got some tips and tricks of your own to share, please comment below. Your feedback helps us improve and creates a community of DIYers who can learn from each other. So, grab your putty knife, and let’s perfect those walls!


