A well-functioning plumbing system in your home or building is essential for everyday tasks like washing dishes, doing laundry, and taking showers.
However, if the water pressure is too high, it can strain your plumbing system and appliances.
On the other hand, low water pressure can make it challenging to create suds, rinse properly, or even wash your hands.
Testing your plumbing system with air is a technique used to evaluate its condition without water. This approach is beneficial when there is no water on-site, the building is unheated, which can cause pipes to freeze, or water leaks can cause damage.
However, using compressed gas can be dangerous as it can cause pipes to explode under extreme pressure, leading to injury or even death.
Thus, it is not recommended for plastic piping or individuals without extensive knowledge and skills in testing plumbing systems with air.
Learn how to pressure test plumbing with air in seven steps.
Tools and Materials Needed
- Air compressor
- Pressure regulator
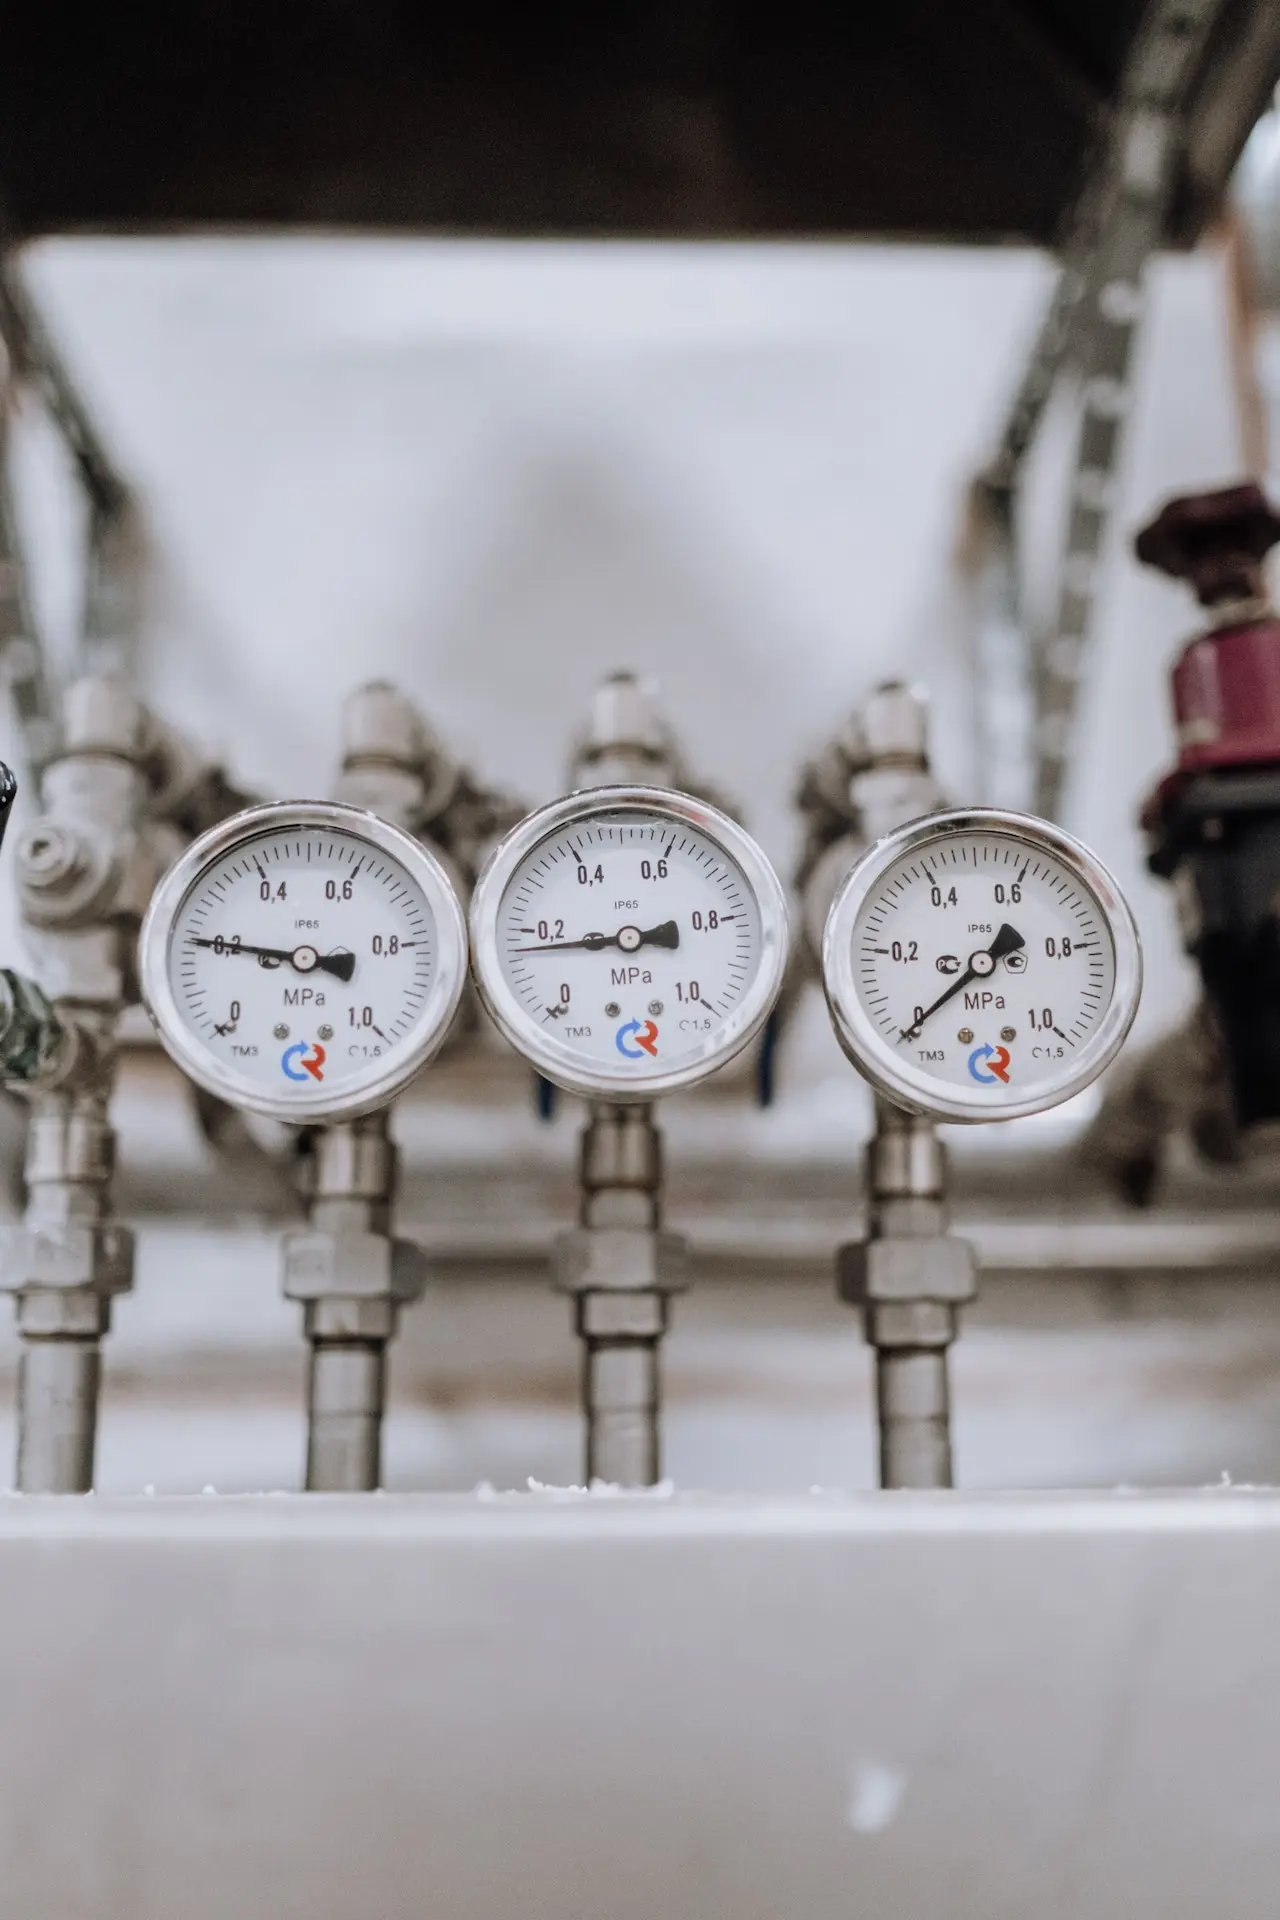
- Pressure gauge
- Air hose
- Plugs
- Teflon tape
- Piping system map
Step 1: Turn off the Main Shutoff Valve
Before testing an existing water pipe system, you must first turn off the main shutoff valve and let the water drain out of the pipes.
Once all the water has been drained, turn off the faucets to prepare for testing.
For a new system, cover all the stub-outs connected to the system being assessed with caps. For water systems, solder or glue the caps to test the pipes in your system.
As for drain vent waste systems, you can use plastic pipe cement to glue caps onto all the stub-outs. After the testing is complete, remove the caps by cutting them off.
Step 2: Install the Proper Fittings
Add some fittings to connect the system’s pressure gauge and air compressor hose.
To test water systems, leave the cap off of one of the stub-outs and install a tee and an adapter for the compressor hose and the pressure gauge on that stub-out.
Meanwhile, for waste systems, you can attach an adapter to a clean-out fitting and then install a tee to complete the setup for testing.
Step 3: Connect the Water Gauge
Attach the water gauge to either the laundry room faucet or an outdoor one with a threaded spout.
Step 4: Connect the Compressor Hose
Find a faucet that you can use to connect the compressor hose. You’ll need to attach an adapter to that faucet and then connect the compressor to the adapter to begin testing.
Step 5: Charge the System
Turn on the compressor and let the pipes fill up with air until the gauge shows the desired test pressure reading.
Remember that the test pressure reading can vary between water and drain systems, so it’s essential to check the plumbing codes for the appropriate test pressure reading for your specific system.
Step 6: Turn off the Compressor
Turn off the compressor and let it pressurize for around 15 minutes. You can then remove the hose from the compressor, leaving a pressure gauge connected.
If, after some time, the pressure reading doesn’t show a change, this indicates that your plumbing is functioning well.
If leaks are present in the system, you may hear air escaping from the pipes.
Step 7: Repairing Plumbing Leaks
If you’ve gone through the seven steps of how to pressure test plumbing with air and still find leaks in your system, it’s a good idea to reach out to a professional plumber.
If you feel confident enough, you could also try to repair the damage yourself. Generally, when it comes to plumbing problems, leaks occur in the joints – any connection between two pipes.
These joints come in three varieties: IPS, compression, and soldered.
Repairing IPS Joints
If you have brass IPS joints in your water system that don’t look too bad for wear, you can try sealing them yourself.
You must wrap Teflon tape around the pipe threads three times clockwise, then apply a thin layer of thread sealant over the first three threads.
Once that’s done, attach the pipe to the fitting with your hands and a wrench until it feels nice and snug.
Repairing Compression Joints
Compression joints are held together by a nut and ferrule system. When they’re attached, they join two pipes together tightly.
If your joint compression needs to be repaired, remove the damaged piece first, then cut in a new pipe to replace it.
Repairing Soldered Joint
Sometimes pipes can leak due to corrosion or poor soldering. If you find a leak in a soldered joint, you can remove the damaged area and install a new pipe.
For plastic pipes with a leak in the middle of the run, you can use a pipe cutter or hacksaw to remove the damaged section of the pipe and put a plastic compression coupling in its place.
But be aware that these steps aren’t recommended for testing plastic pipes for leaks with air pressure. Instead, consider using the water test, which is much safer for plastic.
If you need a temporary fix, you can use a pipe clamp or epoxy putty, depending on your pipe material.
Still, it’s important to fix the pipes permanently as soon as possible because water leaks can cause structural and material damage and eventually cause the pipes to burst.
Benefits of Pressure Testing Plumbing with Air
Pressure testing plumbing with air is a great way to identify potential issues with your plumbing.
It works by applying extra pressure to the system, and then checking for leaks or weaknesses. Here are three advantages of this process:
- Detecting Leaks and Weaknesses in the System
One of the significant advantages of pressure testing plumbing with air is that it helps to detect leaks and weaknesses in the system.
Any leaks or weaknesses will become apparent when air pressure is applied to the plumbing system. This allows for prompt repair of the problem, preventing more extensive damage and costly repairs in the future.
- Saving Time and Money on Repairs
By detecting leaks and weaknesses early on, pressure testing plumbing with air can save time and money on repairs.
Small leaks can go unnoticed for an extended period without pressure testing, causing water damage and eventually leading to more extensive repairs.
By discovering leaks early on, pressure testing can save homeowners high repair costs and prevent extensive water damage.
- Ensuring the Reliability and Safety of the System
Another benefit of pressure testing plumbing with air is that it helps ensure the reliability and safety of the system.
By identifying leaks and weaknesses, homeowners can take steps to repair the problem and prevent future issues.
This ensures the plumbing system functions correctly, minimizing the risk of accidents, such as burst pipes or flooding.
You might be interested in 6 Common Shower Plumbing Parts and How to Fit Them Together
Frequently Asked Questions About Pressure Testing Plumbing with Air
How often should pressure testing be done on a plumbing system?
Pressure testing is an important part of maintaining a plumbing system. It should be done once a year to check for any leaks or blockages that could cause issues.
A more thorough check should be done every five years or if a major renovation has been done to the plumbing system.
Regular maintenance and pressure testing are essential to keep the plumbing system running efficiently and effectively.
Is pressure testing plumbing with air safe?
Yes, pressure testing plumbing with air is safe and an effective way to check for any leaks or blockages in a system.
The process involves filling a pipe or tank with air and then measuring the pressure that builds up from the air.
If there are any weaknesses in the pipes or blockages in the system, this will be revealed through the pressure test.
Can pressure testing cause damage to the plumbing system?
In some cases, pressure testing can cause damage to the plumbing system. If the pressure test is conducted too quickly, it can create excessive stress on the pipes, causing them to burst or crack.
It is important to thoroughly read and understand the instructions for pressure testing before doing it yourself, as it can be dangerous if not done correctly.
Additionally, experienced professionals should always be consulted when conducting plumbing maintenance or repairs.
Can pressure testing detect all types of leaks in a plumbing system?
Pressure testing can detect most types of leaks in a plumbing system. It is an effective way to check for any blockages, cracks, and other weaknesses in the system.
However, it may not be able to detect minor leaks or ones that are hidden deep within the pipes. Other methods, such as leak detection or video camera inspections, are needed in these cases.
Conclusion
Pressure testing with air is an important part of any plumbing maintenance or repair job. It can help detect any potential blockages or weaknesses in the system and save you time and money in the long run.
With the right approach, pressure testing with air can be a safe and effective way to keep your plumbing system up and running.
However, it is important to read the instructions carefully, take proper safety precautions, and consult a professional if needed.


